 |
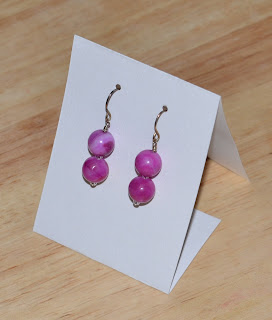
| The earring display! |

So here you go, step by step instructions, with pictures. This is a picture of the supplies that I used to make these cards. A paper cutter, 8 1/2" white cardstock, scissors, a 1/8" round hole punch, a bone folder, a craft knife and a plastic folder. I also used a dime, but any small round object would work.

Step 1: I decided what size I wanted my earring cards to be when they are standing up. I decided on 2" wide by 2 3/4" tall. So 2 3/4" tall, times 2 for the front and back, plus 1 1/2" for the bottom. That gave me a total length of 7". I then cut my white cardstock into 2" by 7" strips.

Step 2: Using the ruler, I measured 2 3/4" of length, and started the fold. I made it a sharp crease using the bone folder. (Don't worry, they aren't made from bone anymore, just plastic)

Step 3: Using the bone folder, I folded up the bottom tab, completing the folds.
Step 4: I used a plastic report cover I found on clearance for 42 cents!! But any thick firm plastic would work just fine. I cut off a strip, about 2 inches wide, since thats the width of my earring cards. Next I figured out where I wanted my holes placed on the card. I then punched holes where I wanted them.
 |
| I wrote "top" so I wouldn't get mixed up :) |
Step 5: I lined my template up at the top of my earring card (unfolded!) and punched the holes. I tried using a paper template, but I just kept making the template holes bigger. The plastic worked much better, because I was able to "seat" the hole punch in the hole, and make it much more precise.
Step 6: I folded the card back up, and drew a little line in pencil, for where I was going to put my slit.
 Step 7: I opened the card back up, and using the craft knife and the dime as a template, I sliced a half circle along the line, with the convex part pointing down toward where the flap would fold up.
(If anyone is aware of a paper punch that would make this shape, I would be eternally grateful, as this is the most tedious step.)
Lastly, I placed my earrings inside and folded it up in a nice little package!
These are perfect little displays if you do shows or have your jewlery in a shop. The earrings are displayed very prettily, and then when they are purchased you just have to fold the paper the other way, and close up the package. As a final touch you could place the earrings in a box, a pretty bag, seal with a sticker, or some other pretty little finishing touch. You can finish this off in many ways to personalize it and put your brand on it. You can use any color or pattern of paper you want. The size can be adjusted to fit your personal designs. The options are essentially limitless.
Hopefully this little tutorial will help someone create the earring display/packaging they have been wishing for!
Side note: There are a couple of "earring card punches" available on the market. One is insanely expensive. The other makes a large slot for leverback earrings, as well as the single hole for post or wire earrings. Its a personal choice for me, that I don't like the look of the large slot for leverback earrings. If you don't mind the look, the hole punch would make this process much simpler, as you wouldn't need the template.


